效果图:


实现思路:
本人也是第一次做app的自定义相机功能,找了相关文章后,发现uniapp自带的相机组件是不能实现在app中自定义相机的功能,因为不支持。按照前辈们的思路,是使用uniapp中的live-pusher直播组件,使用uni.createLivePusherContext()这个api去实现自定义相机的功能。使用api的预览:startPreview() 方法,实现自定义相机的预览功能。使用api的快照功能:snapshot(),实现相机拍摄照片的功能。这样子基本功能就实现了,接下来就是实操阶段了,直接上代码:
<template><uv-navbar :title="title" @leftClick="leftClick" :titleStyle="{fontSize:'18px',fontWeight:'600'}" :placeholder="true"></uv-navbar><view class="live-camera" :style="{ width: windowWidth, height: windowHeight }"><view class="preview" :style="{ width: windowWidth, height: windowHeight -95 }"><live-pusherid="livePusher"ref="livePusher"class="livePusher"mode="FHD"beauty="0"whiteness="0":aspect="aspect"min-bitrate="1000"audio-quality="16KHz"device-position="back":auto-focus="true":muted="true":enable-camera="true":enable-mic="false":zoom="false"@statechange="statechange":style="{ width: '560rpx', height: '890rpx' }"></live-pusher><!--提示语-->
<!-- 			<cover-view class="remind"><text class="remind-text" style="">{{ message }}</text></cover-view> --><!--辅助线--><cover-view class="outline-box" :style="{ width: windowWidth, height: windowHeight - 118}"><cover-imageclass="outline-img":src="coverImage"style=""></cover-image></cover-view><!-- <cover-view class="outline-box" :style="{ width: windowWidth, height: windowHeight - 80 }"><cover-imageclass="bg-img"src="/static/xiangji.png"style=""></cover-image></cover-view> --></view><view class="menu"><!--底部菜单区域背景--><cover-image class="menu-mask" src=""></cover-image><!--返回键--><text class="menu-back" @tap="back" v-if="quxiao">取消</text><!--快门键--><cover-image class="menu-snapshot" @tap="snapshot" :src="xjkm"></cover-image><!--反转键--><!-- <cover-image class="menu-flip" @tap="flip" src="/static/live-camera/flip.png"></cover-image> --></view></view>
</template><script>
let _this = null;
export default {data() {return {poenCarmeInterval: null, //打开相机的轮询dotype: 'face', //操作类型aspect: '2:3', //比例cameraWidth: '', //相机画面宽度cameraHeight: '', //相机画面宽度windowWidth: '', //屏幕可用宽度windowHeight: '', //屏幕可用高度camerastate: false, //相机准备好了livePusher: null, //流视频对象snapshotsrc: null, //快照xjkm:'/static/xjkm.png',quxiao:false,isPreview: false, // 添加这个状态来控制是预览还是保存savedImagePath: '',title:'',navHight:0,detail:'',coverImage:'',};},onLoad(e) {_this = this;// this.dotype = e.dotype;this.initCamera();this.detail = e.pagesNumber;if(this.detail == '1'){this.title = '身份证人像面'this.coverImage = '/static/xiangji.png'}else if(this.detail == '2'){this.title = '身份证国徽面'this.coverImage = '/static/xjgh.png'}else if(this.detail == '3'){this.title = '驾驶证主页'this.coverImage = '/static/rzmc.png'}else if(this.detail == '4'){this.title = '驾驶证副页'this.coverImage = '/static/rzmc.png'}else if(this.detail == '5'){this.title = '护照'this.coverImage = '/static/rzmc.png'}},onReady() {this.livePusher = uni.createLivePusherContext('livePusher', this);this.startPreview(); // 开启预览并设置摄像头this.poenCarme();},methods: {leftClick(){uni.navigateBack({});},//轮询打开poenCarme() {//#ifdef APP-PLUSif (plus.os.name == 'Android') {this.poenCarmeInterval = setInterval(function() {// console.log(_this.camerastate);if (!_this.camerastate) _this.startPreview();}, 2500);}//#endif},//初始化相机initCamera() {let arr = uni.getSystemInfoSync().safeAreaInsets;_this.navHight = arr.top + 44//处理安卓手机异步授权问题uni.getSystemInfo({success: function(res) {_this.windowWidth = res.windowWidth;_this.windowHeight = res.windowHeight - _this.navHight;_this.cameraWidth = res.windowWidth;_this.cameraHeight = (res.windowWidth - _this.navHight) * 1.5;}});},//开始预览startPreview() {this.livePusher.startPreview({success: a => {console.log(a);},});},//停止预览stopPreview() {this.livePusher.stopPreview({success: a => {_this.camerastate = false; //标记相机未启动}});},//状态statechange(e) {//状态改变console.log(e);if (e.detail.code == 1007) {_this.camerastate = true;} else if (e.detail.code == -1301) {_this.camerastate = false;}},//返回back() {if (this.isPreview) {this.isPreview = false;this.startPreview();this.xjkm = '/static/xjkm.png';this.quxiao = false;return;}uni.navigateBack();},//抓拍snapshot () {if (!this.isPreview) {// 第一次点击:拍照this.xjkm = '/static/xjbc.png'this.quxiao = truethis.livePusher.snapshot({success: e => {this.snapshotsrc = e.message.tempImagePath;this.livePusher.stopPreview();this.isPreview = true;}});} else {// 第二次点击 保存到手机相册uni.saveImageToPhotosAlbum({filePath: `file:/${this.snapshotsrc}`,success: (res) => {uni.showToast({title: '保存成功',icon: 'success'});setTimeout(()=>{this.submit()},1500)},fail: (err) => {console.error('保存失败:', err);}});}},//反转flip() {this.livePusher.switchCamera();},submit(){uni.$emit('getSrc',{url:`file://${this.snapshotsrc}`,index:this.detail})uni.navigateBack({delta: 1 // 返回的页面数})},}
};
</script><style lang="scss">.bg-img {width: 100vw;height: 100vh;}
.live-camera {.preview {justify-content: center;align-items: center;.outline-box {position: absolute;top: 0;left: 0;bottom: 0;z-index: 99;align-items: center;justify-content: center;.outline-img {width: 750rpx;height: 1200rpx;// background-color: #626262;}}.remind {position: absolute;top: 880rpx;width: 750rpx;z-index: 100;align-items: center;justify-content: center;.remind-text {color: #dddddd;font-weight: bold;}}}.menu {position: absolute;left: 0;bottom: 0;width: 750rpx;height: 254rpx;z-index: 98;align-items: center;justify-content: center;background-color: #141414;.menu-mask {position: absolute;left: 0;bottom: 0;width: 750rpx;height: 180rpx;z-index: 98;background-color: #141414;}.menu-back {position: absolute;left: 60rpx;top: 100rpx;z-index: 999;color: #ffffff;font-size: 16px;lines: 1;text-align: center;padding: 10rpx;}.menu-snapshot {width: 130rpx;height: 130rpx;z-index: 99;}.menu-flip {position: absolute;right: 30rpx;bottom: 50rpx;width: 80rpx;height: 80rpx;z-index: 99;align-items: center;justify-content: center;}}}
</style>
代码逻辑:
这个页面我实现了自定义相机拍摄身份证、驾驶证和护照的功能。所以自定义了页面导航栏和自定义相机的蒙层图片。
live-pusher组件配置说明:
mode="FHD"表示全高清模式。beauty="0",whiteness="0"禁用美颜和美白。aspect="aspect"设置视频比例(动态绑定)。device-position="back"使用后置摄像头。auto-focus="true"启用自动对焦。muted="true"禁用麦克风。- 绑定了事件
@statechange="statechange"监听摄像头状态变化 - :style="{ width: '560rpx', height: '890rpx' }"设置了组件的大小,这样子就不用拍摄照片后再去截取所需要的图片再保存到手机这么麻烦。

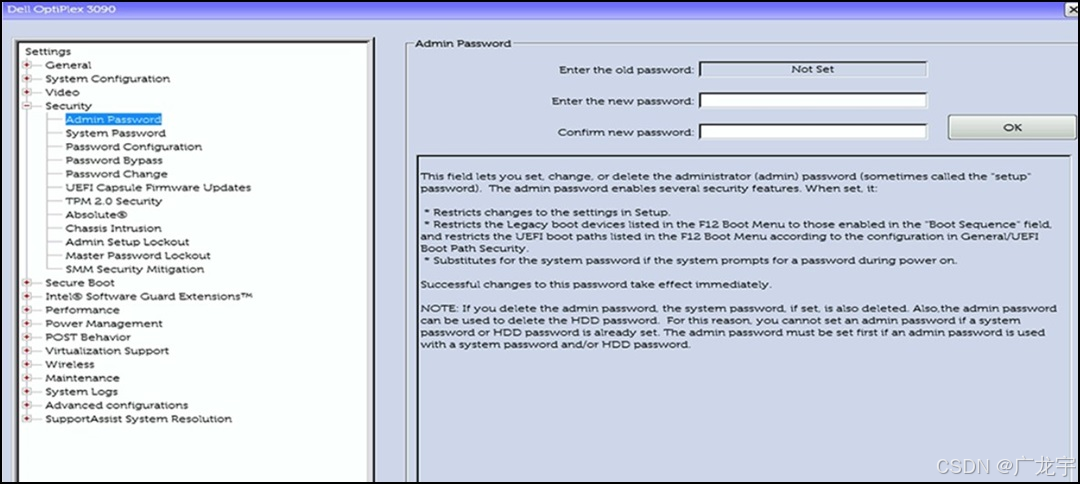
这段代码,就是设置自定义相机的蒙层,也就是你需要让UI给你找身份证拍摄相关的图片,然后保持图片中间的框内是透明的,旁边的是不透明的就可以了,再把live-pusher组件的大小设置和中间框的大小一致就行,还有就是要开启app权限:


按照上面的步骤,已经基本完成了自定义相机的功能。然后我们保存照片到手机相册后,要到对应的页面去显示这个图片,所以我使用了uniapp的$on和$emit方法,将图片地址发送过去。
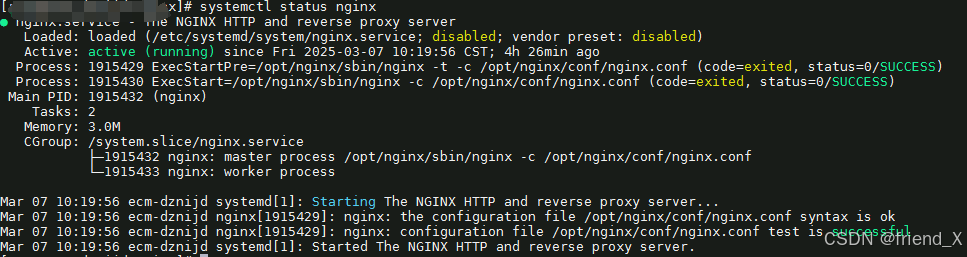
在上一级页面接收到这个url地址后进行渲染。但渲染有一个问题,因为我们拍摄的图片是横屏拍摄的,所以按照之前的页面布局显示图片会变得很小,如图:

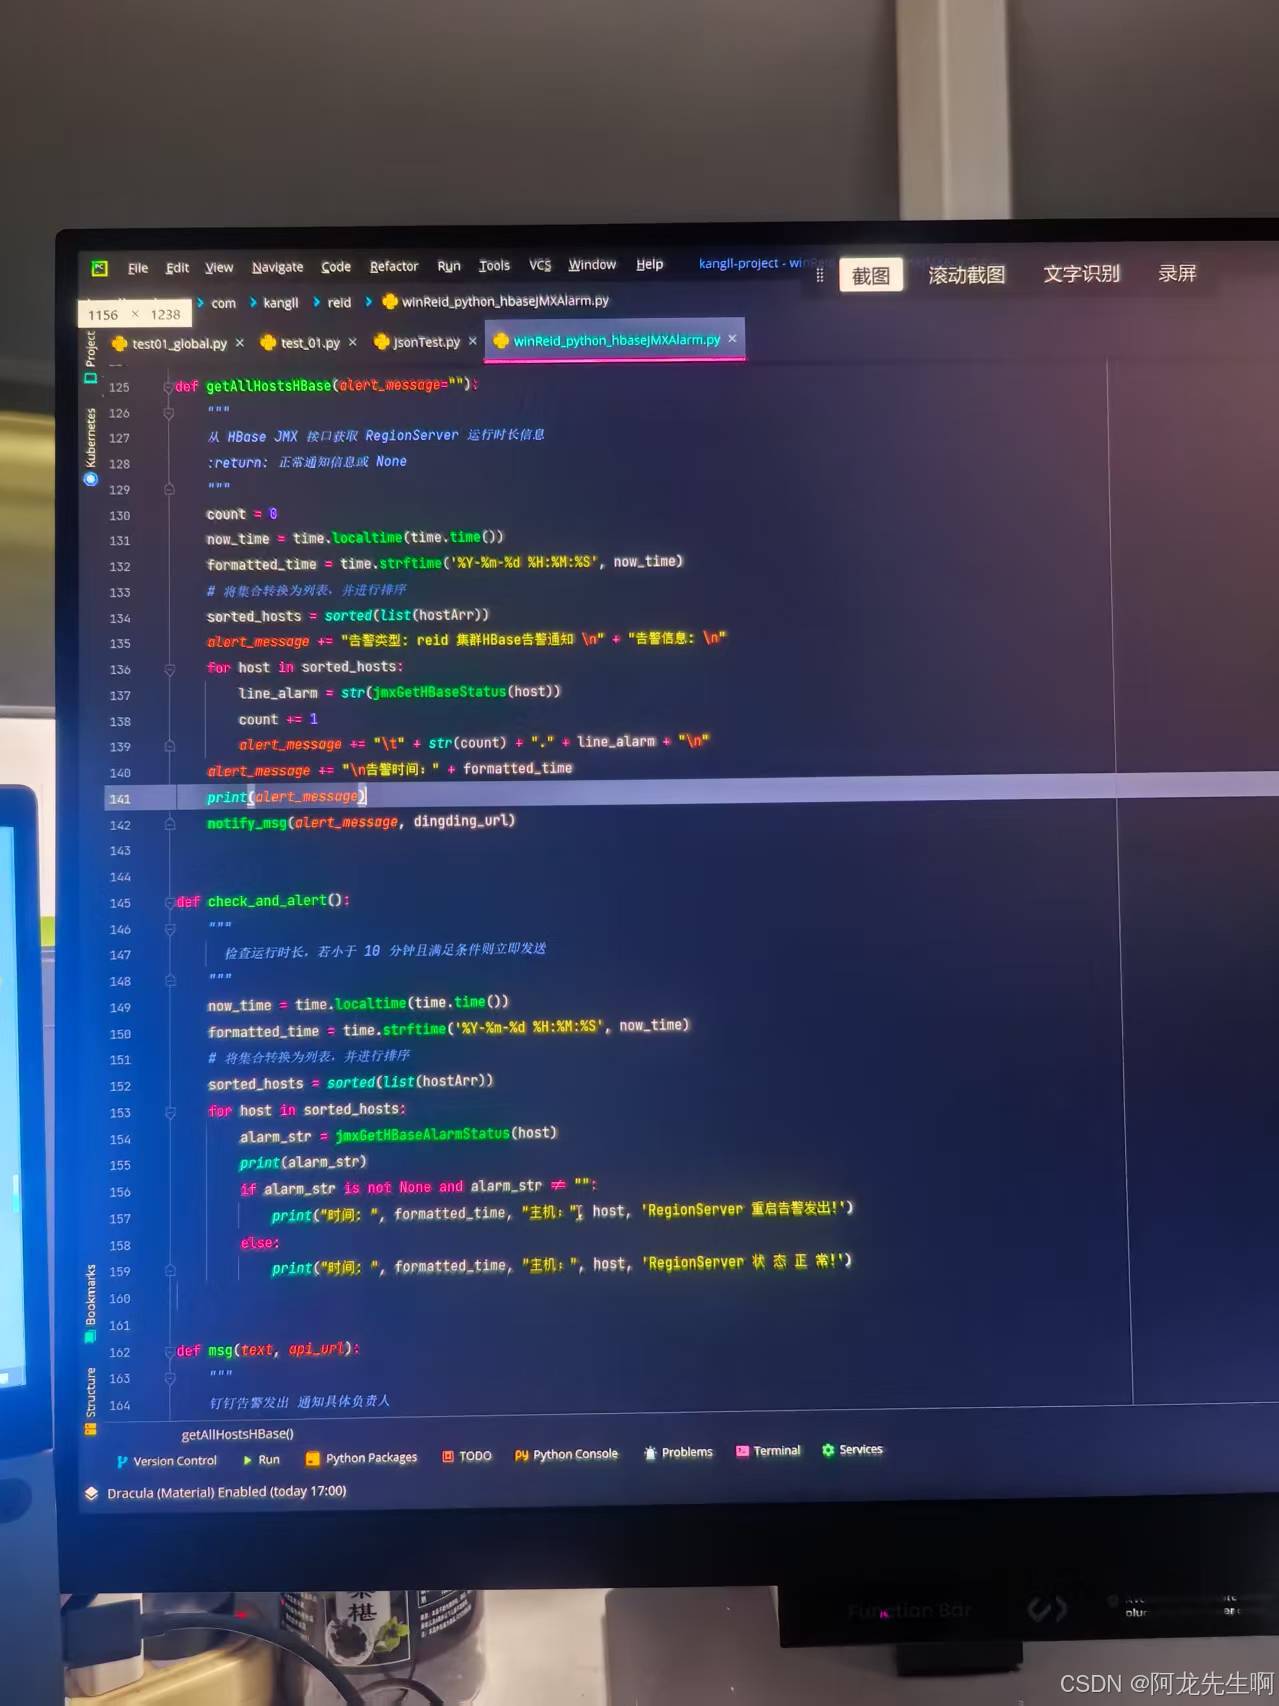
这并不是我们需要的效果,我们需要的效果应该是和下面的一样,铺满整个image标签才行,所以在回显的页面中我们要设置一下image的css:


添加这些样式后,就可以实现正常的回显效果了:
结尾:
以上就是实现整个自定义身份证相机的功能,希望能帮助到大家!!


![[原因和较为完美的解决方法]远程主机可能不符合 glibc 和 libstdc++ Vs code 服务器的先决条件](https://i-blog.csdnimg.cn/direct/1c06d7827d4b4a7f98c52b91c4e1b8da.png)